Saturday, April 13, 2013

Tutorial 28 - Codea v1.5.2: Objective C Add On, Audio

Figure 0. Codea Audio Player

28.1 Overview


CodeaAddon is an experimental protocol for adding native extensions to exported Codea projects. You must deal with Lua directly to register your functions and globals. This protocol should be considered alpha in version 1.5.2 and is subject to change in future Codea releases. If the protocol changes we will update the tutorial to reflect this.

As our first example we will demonstrate how to play an mp3 file from within Codea. iOS provides a number of mechanisms for implementing audio playback. The easiest technique from the perspective of the application developer is to use the AVAudioPlayer class which is part of the AV Foundation Framework. Apple recommends that you use this class for audio playback unless you are playing audio captured from a network stream or require very low I/O latency.

Upon instantiating an AVAudioPlayer class, the playback of audio may be controlled and monitored via the methods and properties available. Play, pause and stop methods may be used to control playback and the volume property may be used to adjust the volume level. The playing property may be used to determine whether or not the AVAudioPlayer object is currently playing audio. Using an audio player you can:
  • Play sounds of any duration
  • Play sounds from files or memory buffers
  • Loop sounds
  • Play multiple sounds simultaneously, one sound per audio player, with precise synchronisation
  • Control relative playback level, stereo positioning, and playback rate for each sound you are playing
  • Seek to a particular point in a sound file, which supports such application features as fast forward and rewind
  • Obtain data you can use for playback-level metering

The AV Foundation framework supports the playback of a variety of different audio formats and codecs including both software and hardware based decoding. Codecs and formats currently supported are as follows:
  • AAC (MPEG-4 Advanced Audio Coding)
  • ALAC (Apple Lossless)
  • AMR (Adaptive Multi-rate)
  • HE-AAC (MPEG-4 High Efficiency AAC)
  • iLBC (internet Low Bit Rate Codec)
  • Linear PCM (uncompressed, linear pulse code modulation)
  • MP3 (MPEG-1 audio layer 3)
  • ยต-law and a-law
Figure 1. Adding the AVFoundation Framework

You can optionally implement a delegate to handle interruptions (such as an incoming phone call), or if required update the user interface when a sound has finished playing.

28.2 Add the AVFoundation Framework to your App


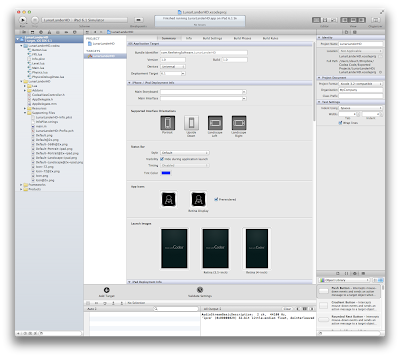
Since the AVAudioPlayer class is part of the AV Foundation framework, it will be necessary to add this framework to the project. Fire up Xcode and load the exported version of your Codea application (See Tutorial 27). Click on the imported project file at the top left of the project navigator then in the Build Phases tab, scroll down to the link binary with libraries area and select the drop down arrow. Click on the "+" button below your existing frameworks to add a new framework. Find AVFoundation framework and click on "Add" (Figure 1).


Figure 2. MP3 File added to the Resource Group


28.3 Add the MP3 file to your Project


Any mp3 files that you want to play in your app need to be included in your project bundle. Adding these is simple. For our tutorial we generated a simple loop using Garage Band and then exported it to an mp3 file. Locate your mp3 and drag it from Finder to the Resources Group (folder) in the the Project Navigator of Xcode (Figure 2). We added a sub folder called Music (right click on the Resources Group and add a new Group) to contain the mp3 file but that is optional.


Figure 3. Adding a new Objective-C class.

28.4 Create our Custom Audio Add On Class


To create our new AudioAddOn class, right click on the Addons Group and select New File... from the pop up menu. Click on Cocoa Touch under iOS and make sure that Objective-C class has been selected (Figure 3), then click on Next.

Select Subclass of type NSObject and call the Class AudioAddOn. The two check boxes (Targeted for iPad and With XIB for user interface) should be greyed out. Click on Next, and then click on Create. Two new files will be added to the Addons Group, AudioAddOn.h and AudioAddOn.m.

The header file for our AudioAddOn class is mostly straight forward. We import the AVFoundation framework which we added above and the CodeaAddon class. AudioAddOn conforms to both the CodeaAddon and AVAudioPlayerDelegate protocols. We define a variable called audioAdOnInstance, which allows us to access Objective C methods from within our C functions playMusic() and stopMusic().

In the initialisation of this class we create our audio player object and assign our mp3 file to it. We also pre-buffer the mp3 file and set the number of loops to be infinite (by assigning a negative integer). At the end we assign audioAdOnInstance to self.

Some of the most used AVAudioPlayer delegate methods have been included, but we don't use them in this tutorial. The code is shown at the end of the tutorial.


28.5 Modifications to the Application Delegate


There are only minor changes to the Application Delegate files. We import our add on in the header file and create an instance variable which points to it (called audioAddOn).

In AppDelegate.mm we instantiate our add on class and then register the add on so we can use it in the Lua code.

To play your mp3 file from within your Lua code just call playMusic() and to stop it, call stopMusic(). Too easy!


Sunday, April 7, 2013

Tutorial 27 - Codea v1.5.2: Export to Xcode

Figure 1. Tap & Hold the Project Icon.

27.1 Exporting to Xcode is Simple


The team at Two Lives Left continue to innovate. The latest version of Codea includes an export to Xcode function which is so simple to use that you can now submit to the App store without knowing any Objective C at all. Previously, incorporating your Lua code into the Codea runtime was something of an arcane art (see our earlier tutorial on submitting an app to the Apple App Store). Now, it is a matter of a few taps. This latest addition really rounds out Codea as the only development environment that you need.


Figure 2. Check the Export Settings

Loading your Codea apps into Xcode is useful for a couple of reasons:
  1. To submit apps to the App Store, this is a necessary interim step;
  2. To add additional functionality which isn't currently available in Codea (e.g. iAds, Game Center, creating a universal app - albeit most of this can be done in Codea, audio support, or hooking into some other Objective C methods). We will discuss this in the next tutorial.
Figure 3. Add a Custom Icon

Figure 4. Select an icon from your Photo Library

Figure 5. Tap on the selected icon

Once you are ready to export an app to Xcode, follow the following steps:
  1. If you want to use a custom icon for your app, you can either attach this as part of the export process or do it later in Xcode. Assuming you want to include it in the export package, you will need to have it completed and stored in your iPad photo library before you start exporting. Codea will create four icons from the one that you include. Their dimensions are 57 x 57 pixels, 114 x 114 pixels, 72 x 72 pixels and 144 x 144 pixels. This is for the standard and retina versions of the iPhone and iPad icons. I suggest attaching an icon with a resolution of at least 144 x 144 pixels to ensure the best quality. If you are submitting to the app store you will need a version with 1024 x 1024 pixel resolution.
  2. In Codea, tap and hold the icon of the project that you wish to export (Figure 1). This will bring up the pop up menu shown. Tap on Export.
  3. Check that the Project settings are correct (Figure 2). Taking these one by one: 
  • The first item is the app name which is taken from the name of your project (not the "Description" meta tag for your project created using saveProjectInfo). 
  • The second item is the developer/author name which is derived from the "Author" meta tag and assigned using saveProjectInfo(). For example, saveProjectInfo("Author", "Reefwing Software"). 
  • The third item, "Company Name" is optional. Note that the bundle ID will use a "short form" of the author or company name you include (it will prefer the company name if specified). A short version of a name simply removes any spaces or special characters in the name. So "Two Lives Left" becomes "twolivesleft", and the bundle ID then becomes com.twolivesleft.projectShortName. The bundle ID is important, as it connects your app in Xcode with your app submission in iTunes Connect. I always use a bundle ID of the form au.com.reefwing.LunarLander, so I will need to tweak this in Xcode regardless.
  • The next item determines whether your app will display the status bar or not (the black bar right at the top of your iPad which shows your wireless connection strength, network provider, time, battery level, etc). This is an option in your applications pList, so if you change your mind later you can change it in Xcode.
  • The final item in Project Settings is Icon. If you are happy with the default Codea icon for your app then you need do nothing. Most people will want to assign a custom icon however, and tapping the arrow to the right of "Icon" will allow you to do this (Figure 3). Tap on the "+" in the "Choose Icon" dialog to bring up your photo library and select the icon (Figure 4). If you created the icon on your Mac then importing it into iPhoto will add the image to your Photo Stream (if enabled) which is then available on your iPad to select.
  • The "Included Assets" section allows you to include specific sprite images and shaders in the export bundle. Codea normally does a good job of finding these for you but it will have problems if you are procedurally generating the sprite/shader names in your code. If you find assets are being left out then they can be added here.
  • Once you have confirmed all of the Project Settings, tap the Export Button in the top right hand corner of the navigation bar. Codea will chug away (Figure 6) and create your Xcode bundle. When complete (Figure 7), you are given the option to save your exported project bundle somewhere. You need to get this file onto your Mac, so the simplest method is to use Dropbox. If you haven't already signed up for this then I recommend that you do - it is free - and then install the Dropbox app on your iPad. This makes the file movement very simple.

Figure 6. Exporting your Project...

Figure 7. Exported and ready to save.

  • Assuming you are using Dropbox, tap the "Open With" button shown in Figure 7, and you will be given the option to select Dropbox (Figure 8). Select this and then save the zipped bundle when prompted (Figure 9). You will then have the bundle saved in your Dropbox repository (Figure 10) which you can unzip and access from your Mac.
Figure 8. Select Export Bundle to Dropbox.

Figure 9. Save the zipped Project Bundle.

Figure 10. Bundle Saved in Dropbox.

27.2 Importing your Bundle into Xcode


  1. Open up Finder on your Mac and navigate to the Dropbox folder containing your exported project bundle. Double click on this to unzip the folder (Figure 11).
  2. Open up Xcode and select your unzipped project to open (Figure 12). Optionally you may want to save this folder locally first.
  3. And that's it! You should now be able to run your imported project on the iPad or iPhone simulator.
Figure 11. Unzip your project bundle on the Mac.

Figure 12. Open the Project with Xcode.

Figure 13. Configure your Project in Xcode.

27.3 Pre-App Submission Tweaks

If you are going to submit your app to the Apple App Store for approval and listing on iTunes, then there are a few things you still need to do. Have a read of our previous tutorial on this for the full story but in short:
  1. Click on the project (top left of the project navigator) to bring up the project configuration (Figure 13).
  2. Check that the bundle identifier is the same as that entered in iTunes Connect.
  3. Determine whether you want to distribute a universal app (works on iPad and iPhone) or target a specific device. The default is universal.
  4. Check the supported orientations.
  5. You may want to add your own default load images. The default ones say "made with Codea".
  6. When adding your App to iTunes Connect you will need a version of your icon which is 1024 x 1024 pixels in size.
As shown above, the process is now much simpler than it used to be. Good luck with your submissions!

Monday, February 25, 2013

Tutorial 26 - RLE Image Compression for Spritely


1. Introduction


Todays tutorial is brought to you courtesy of Dermot Balson from the lovely city of Perth (the most remote city on Earth according to Bill Bryson). Dermot noted that Spritely (the image editor which comes with Codea) produces some fairly large and unwieldy image files. Given Dermot's background in compression he immediately worked out a way to dramatically reduce these files in size.

Essentially, Dermot creates an array of unique colours, and builds a string for each of them which consist of two-digit cell addresses. 

Let me hand over to Dermot (@Ignatz on the Codea Forum) to explain how it all works.

2. Description of RLE compression code


Run Length Encoding (RLE) is a well known compression technique. Essentially, you run through the cells, and every time the color changes, you store the last color and the number of cells it applied to.

The RLE code can be downloaded below and has several classes.

3. Functionality


The RLE compression code can turn any image (with reason - see below) into code strings, and the Decode function can reassemble the image from these strings.

It can take images from the libraries, or Spritely code, and convert to compressed code.

The ImageCoder:code function takes the image as input and prints the code to recreate it. 

The Test tab shows how this code is used. NB this function also returns the two strings required to decode the image. This is only for testing purposes so the Main tab can show how it works - in practice, users will use the printed code.

The Decoder:Decode function takes two strings as input and returns an image

The Main function carries out several tests:

  1. It reads in an image from the standard library, codes and then decodes it back to an image
  2. It takes an image created by Spritely code (in the IconImages tab), and encodes/decodes it back to an image
  3. The code strings created for the Spritely code are used in the Test tab to demonstrate how to use them to decode an image

All three images above are drawn on screen. The first two images have their originals drawn above them for comparison purposes.

4. Using it in Practice


The ImageCoder tab is needed to encode images.

The Decoder tab needs to be included in any project where you want to decode the RLE images.

5. Compression


The level of compression depends on many factors, but as one indication, the size of the Spritely code in this example is about 28,000 chars, compared to 1,000 chars for the RLE version.

To be fair, this is largely because the Spritely image has a background color, meaning all 1,024 cells have to be coded. An image without a background would be much smaller.

6. Image Limits


The practical limits on image size and complexity are processing speed and storage, because the greater the number of colors and cells, the more space we have to allow for each item. Currently, it can allow for up to 4,096 unique r,g,b,a combinations, and up to 4,096 characters of the same color in a sequence. Increasing storage from 3 to 4 chars per item would increase capacity by a factor of 16, but would blow out the data by 1/3.

There are all sorts of ways to tweak for speed, but this may be good enough. I will tweak if there is demand for it.

7. Download the Code


Dermot has been kind enough to share his RLE coding and decoding classes. It is very well commented, so you should have no problems in following what he has done. You can download the complete project (useful for pasting directly into Codea) or the individual classes using the links below:

  1. RLE Complete v1.lua - This includes all of the individual classes and test images.
  2. RLE Readme.lua - Replicates most of the text description shown above.
  3. RLE Main.lua - The Main tab from the complete project.
  4. RLE Coder.lua - The RLE coding class.
  5. RLE Decoder.lua - The RLE decoding class.
  6. RLE Test.lua - sample string to test decoding.
  7. Spritely Flag Image.lua - The flag image from the MineSweeper program, produced using Spritely and used here to demonstrate the compression capability of the RLE algorithm.


Sunday, January 27, 2013

Tutorial 25 - A Lua Primer for Codea (Part 1)

25.1 Introduction


Every year around Christmas there is a surge of activity on the Codea Forums and on this tutorial site. A common theme in the comments and emails that we receive, is that this site assumes quite a bit of knowledge and as Codea appears to be attractive to first time programmers there are some gaps which need to be filled.

This tutorial is an attempt to fill in some of those gaps. In particular, we will try and provide a quick primer on the Lua language which Codea uses. To ensure that Codea does not incur the wrath of Apple, there are some features of the Lua language which have been disabled in Codea. We will discuss these briefly but the list is diminishing with every new release of Codea and there isn't anything which will likely cause you any problems.


25.2 Lua


Lua is a light weight scripting language written in C. By light weight we don't mean that it isn't capable of writing complicated code but that the syntax is stream lined and straight forward. This makes it a great first language to learn. 

Lua means "moon" in Portugese, it is the evolution of another language called SOL (Portugese for "sun"). It was created in 1993 by Roberto Ierusalimschy, Luiz Henrique de Figueiredo, and Waldemar Celes, members of the Computer Graphics Technology Group (Tecgraf) at the Pontifical Catholic University of Rio de Janeiro, in Brazil (hence the Portugese naming).


25.3 Variables and Data Types


Variables are memory locations that hold data. There are three kinds of variables in Lua: global variables, local variables, and table fields. All variables are global unless defined otherwise. Defining an identifier as local is done using the local keyword. Local identifiers are not visible outside the block in which they were declared, but are visible inside sub-blocks. This is called lexical scoping. For Codea a tab is considered a chunk,  which translates as follows:
  1. If you define a variable within any of the tabs it will, by default be treated as global.
  2. If you define a local variable within a tab (but outside a function), you will only be able to access it within that tab.
  3. If you define a local variable within a function, you can only access it from within that function. However, if a function is enclosed in another function, then it has access to all the local variables of that function. In these circumstances, the external local variable is called an "upvalue". We cover this in Interlude 7.
Assigning to a variable that has not been declared locally within the current chunk will recursively search for that name in the parent chunk, up to the top-level. If the name is found, the assignment is made to that variable. If the name is not found, the assignment becomes a global (either creating a new variable, or replacing an existing global). The consequence of this behaviour is that using local variables is much faster than globals.

Global identifiers are stored in the implicit global environment table, which can explicitly be accessed through the name _G (see section 25.5).  

Variable names must start with a letter or underscore and can contain letters, digits or underscores. Defined keywords in Lua can not be used as a variable name (e.g. and, break, do, else and end). As a convention, variables in capitals starting with an underscore (e.g. _G or  _VERSION) are reserved for internal Lua global variables.

Lua supports only a small number of data types. The ones you will use the most are boolean (true or false), numbers, strings and tables. 

By default, Lua's number type is represented by double-precision floating-point numbers. However, Codea's Lua interpreter uses another internal representation for numbers: single-precision float. This gives a precision of 6 to 9 significant decimal digits and a range for positive values of between about 1.4e−45 to about 3.4e+38 (reference from Codea Wiki).

Lua strings can hold any 8-bit character, including embedded zeros. Strings can be enclosed in single or double quotes, pick one style and stick with it, we tend to go with double quotes. Strings in Lua are immutable values, and thus you cannot change a character inside a string. You can also delimit literal strings using matching double square brackets. For example:

aLongString = [[
                   line 1
                   line 2
                   line 3
                   line 4
              ]]

Boolean variables are a relatively recent introduction to Lua. The boolean type has two values, true and false. Conditional tests consider false and nil as false and anything else as true (including 0 and "").

Lua is a dynamically typed language, which means that variables do not have a defined type, they get their type based on the data assigned to them. This means that the following is a valid chunk of code in Lua (albeit probably not best practise as it would make your program hard to follow):

x = 1
print("x as an integer: " .. x)
x = 3.141592654
print("x as a float or real number: " .. x)
x = 0xFE
print("x as a hexadecimal converted to decimal: " .. x)
x = "now a string"
print("x as a string: " .. x)
x = true
print(x)
x = {value = 999}
print("x as a table: " .. x.value)
x = function(n) return n*2 end
print("x as a function: " .. x(2))

A few comments about the preceding code and some general observations on variables: 
  • Lua is case sensitive, so x and X are different variables. 
  • In the example above, when we store a hexadecimal value in x it is automatically converted and printed as a decimal.
  • You can concatenate (i.e. join) two strings or a string and a number using the".." operator. Numbers are automatically converted to strings in this situation. You can't concatenate a boolean.
  • This automatic conversion (or to use the technical term - coercion,  works the other way around as well, a string will be treated as a number if used in that context. Any arithmetic operation applied to a string tries to convert this string to a number. Note that comparison operators (== ~= < > <= >=) do not coerce their arguments. Thus a number is not equal to its string representation.
  • Each line of code is terminated by a new line. You can optionally use a semi-colon (as used in C, but it isn't recommended). 
  • You can do multiple assignments on the one line (e.g. x, y = 1, 2), and you can use this to swap two variables (e.g. x, y = y, x).
  • A variable that hasn't been assigned a value will be nil by definition. 
  • Unlike C, the value 0 is not a false test condition in Lua, only nil or false is. You can use the fact that nil equates to false to assign default values to a variable (e.g. x = x or 2 will assign the variable x a value of 2 if it hasn't been previously assigned a value).
  • Note that you can assign a function to a variable. As an example, we make use of this in Codea to pass call back functions to our Button class to indicate what function to call when a button is tapped. The technical term for this feature is first-class functions. As such, they can be created during runtime, stored in variables, and passed to and returned from other functions.
There are two other data types called userdata and thread. Userdata and tables will be covered in subsequent sections. Thread is way outside the scope of this tutorial so we are just going to ignore them.


25.4 Tables


Tables in Lua are amazingly versatile. Which is just as well since they are the only built in composite data type available. The technical term for tables in Lua is a hashed heterogeneous associative array and they are worthy of a separate tutorial, which is exactly what we have done. You can access our tutorials on tables here:
  1.  Understanding Tables;
  2.  Converting a string to table and table to string
  3.  Saving and Loading complicated tables; and
  4.  Classes in Lua and Codea.

25.5 The Global Variable Table _G


This section goes beyond the scope of this tutorial, so feel free to skip ahead. It is included here out of interest. We mentioned above that Lua has a number of internal variables. One of these is _G, a global variable which points to the global environment. It includes all of the global variables and functions and even includes a reference to itself! It is sometimes useful to understand what has been defined globally and you can use the following to display the contents of _G: 

for k, v in pairs(_G) do print(k, v) end


25.6 Userdata


Userdata are variables that encapsulate arbitrary C/C++ data within a Lua interface. Many Lua modules extend the capabilities of Lua by binding external libraries, including the creation of new types as userdata. Userdata variables can only be created using the C API (i.e. in our context this means the Codea runtime), this can't be done in Lua.

Userdata is largely outside the scope of this tutorial but you need to know that Codea extends Lua with 12 user-defined types such as codeaimage, mesh, matrix, vec2, vec3, touch and color. You can read all about these on the Codea User Defined Types page.

Userdata is also useful when we want to expose C/Objective C functions in Lua via the runtime. Have a look at our tutorials on integrating Game Centerbuilding a Universal App or implementing iAds if you are interested.


25.7 Operators


Lua supports the following arithmetic operators:  + (addition), - (subtraction), * (multiplication), / (division), % (modulo),  ^ (exponentiation) and  - (negation).

The relational operators in Lua are: == (equal), ~= (not equal), < (less than), > (greater than), <= (less than or equal to), and >= (greater than or equal to). These operators will return a boolean (true or false).

The logical operators in Lua are and, or, and not. As for control structures, all logical operators consider both false and nil as false and anything else as true.

As mentioned in section 25.3, the string concatenation operator in Lua is denoted by two dots ('..'). If either operand is a number, then it is converted to a string before joining.

The length operator is denoted by #. The length of a string is its number of bytes (i.e. characters). The length of a table is more complicated. For a table used as a simple array the length operator will work as expected and return the number of elements in the array. For more complicated tables, the returned length can be any of the indices that directly precedes a nil value. You can read more about this in our tutorial on tables.

25.8 Classes


In Interlude 11 we spoke about the use of classes in Codea. Codea comes with a built-in global function called class() that is used to emulate the functionality of a class data structure using a table (and metatable). We use classes extensively in our tutorials but we haven't explained the difference between the "." and ":" operators when applied to a class. As this has been the subject of a number of questions, we will cover the proper usage in this section.

In order to demonstrate, we will first construct a simple ship class. By convention the base class name starts with a capital, while instances of the class have names which start in a lower case letter. 

The Codea class() constructor is a function which, when called, sets up a new table and attaches the class metatable to it. The metatable redirects unrecognized events to the class method table (as well as possibly handling events itself). This is covered in some depth on the Codea wiki.

Ship = class()

function Ship:init( hitPoints )
    self.points = hitPoints or 100
end

function Ship:hit( damage )
    self.points = self.points - damage
    print( self.points )
end

In our Main tab, setup() function we may then instantiate our class as follows:

myShip = Ship()

This will create a new object called myShip of class Ship. Note that we called ship without any parameters. This means that hitPoints will be nil and self.points will be assigned 100 (our default value) since nil is interpreted as false by Lua. 

One of the potentially confusing parts of the class definition is where does "self" come from and why do we use it? The self variable is created automatically by calling class() and provides a reference to the object created when we instantiate a class. This means that when we change the points variable using self.points we only change it for that object, not for every object of class Ship. So in our example above self = myShip. 

Try converting the Ship class so that it uses points instead of self.points. If you do this and have created another ship (e.g. myOtherShip = Ship()), then every time you call myShip:hit(20) this will also reduce the hit points of myOtherShip, which is usually not what you want.

If our ship gets hit then we want to record the damage and print out the current hit points using the hit(damage) function of our class. There are two ways you could do this (the right way and the wrong way!). In the Main tab of your program, you could use:

myShip:hit(20)

or you could try to use:

myShip.hit(20)

Which is correct? To work this out we have to understand the difference between the two statements. Using ":" we are actually passing two parameters to hit(), the damage and a hidden reference to the object being hit (i.e. self). So myShip:hit(20) is equivalent to myShip.hit(self, 20). 

The second option - myShip.hit(20) will throw an error in Codea. If you want to access the class instance variables directly from the Main tab, you can do something like:

myShip.points = myShip.points - 20

This will operate as expected, but only if you have defined it as self.points in your class.


25.9 Other Resources


If what is provided here isn't sufficient then have a look at the official Lua Tutorial site, which has a MUCH more detailed treatment on Lua. The Codea reference documentation is also very useful, as is the active forum and wiki (in particular have a look at the Hints and Tips page which contains references to items not covered elsewhere). 

Codea (v1.4) uses version 5.1 of Lua (you can determine the current version of Lua using the statement print(_VERSION)). The definitive treatment of the Lua language can be found at the official on-line Lua 5.1 Reference Manual

Friday, November 30, 2012

Interlude 14 - Update on MineSweeper Sales


14.1 Overview


MineSweeper was initially launched at the end of August 2012. To date it has been downloaded by 2,484 people which is an average of 20 per day. As the graph above shows, averages don't paint an accurate picture of the download distribution. The first month (September) accounts for 2,393 or 96% of these downloads. Since the end of September, the average download rate has been 1 per day.


14.2 Version 1.7 Release


The first published update to MineSweeper was version 1.7 which made the App universal, included Game Center support and added iAds. You can see the bump in downloads on the release day in the graph above. This bump is a pale shadow compared to the initial release bump (11 vs 471).

14.3 Geographic Distribution


37% of downloads has been from the US which is not unexpected, but the next largest region is Germany at 9% which is curious.


14.4 What can we deduce?


These are only statistics from one application over a 3 month period and the enhancements from v1.7 have only be around for 3 days so we need to be careful not to identify trends that don't exist.
  1. iAds - Requests and Impressions can given you a feel for usage of your App each day. It is very early days so hard to conclude anything yet. In order to maximise revenue the download curve would suggest that you would be better off including iAds in your initial release rather than a subsequent upgrade.
  2. Game Center - will also give you an indication of app usage. In the 3 days that Game Center has been available, 9 people have recorded high scores in the Easy Difficulty leader board.
  3. Geographic Distribution - Based on the geographic download distribution, if we were to localise the app then German would be the first language that we should implement.
  4. Upgrades - For the 3 days that v1.7 has been released there has been 419 upgrades downloaded. We would expect another 100 or so over time but upgrades give you a feeling for how many people keep your App on their device after the initial download.

Saturday, November 24, 2012

Tutorial 24 - Basic 3D Graphics

Figure 1. Ripple Shader.

24.1 Setting the Scene


Version 1.5 of Codea is a huge update. In addition to camera access, image blend modes and a tween library for simple animation, it includes full access to shaders and a shader editor. This feature gives you full access to GLSL (OpenGL Shading Language) vertex and fragment shaders (which can be used to apply the ripple shader effect shown in Figure 1). To understand how to implement and use shaders we need to take a few steps back and provide some graphical foundations.

24.2 OpenGL


OpenGL is a multipurpose open-standard graphics library. Although it is actually a specification, it is usually thought of as an Application Programming Interface (API), which is the manifestation of this specification. The OpenGL API uses C and GLSL is very similar in structure to C but has its own peculiarities. As a C API, OpenGL integrates seamlessly with Objective-C based Cocoa Touch applications. The OpenGL API is defined as a state machine (see Tutorial 5), and almost all of the OpenGL functions set or retrieve some state in OpenGL. The only functions that do not change state are functions that use the currently set state to cause rendering to happen.

OpenGL for Embedded Systems (OpenGL ES) is a simplified version of OpenGL that provides a library which is easier to learn and implement on mobile graphics hardware. Apple provides implementations of OpenGL ES v1.1 and OpenGL ES v2.0. Codea uses v2.0.

OpenGL ES 2.0 is very similar to OpenGL ES 1.1, but removes functions that target the fixed-function vertex and fragment pipeline stages. Instead, it introduces new functions that provide access to a general-purpose shader-based pipeline. Shaders allow you to write custom vertex and fragment functions that execute directly on the graphics hardware (which is very fast). 

24.3 Rendering Graphics


Everything displayed on your iPad screen is a 2 dimensional array of pixels. Each pixel has a particular colour defined by a red, green, blue and alpha (transparency) value in the range 0 to 1. It is the purpose of the graphics pipeline to determine what colour to put in each pixel to provide a representation of your image. Displaying a 2D image is fairly straight forward but what about 3D? The process of converting a 3D world into a 2D image is called rendering.

There are many different rendering systems. The one that we will concern ourselves with is called rasterization, and a rendering system that uses rasterization is called a rasterizer. In rasterizers, all objects that you see are represented by empty shells made up of many triangles. These series of triangles are called "geometry", "model" or "mesh". We will use the term mesh as that is what is used in Codea.


Figure 2. Rasterizing a Triangle.

The process of rasterization has several phases. These phases are ordered into a graphics pipeline (figure 3), where the mathematical model of your image, consisting of a mesh of triangles, enter from the top and a 2D pixel image comes out the bottom. This is a gross simplification but may help in the understanding of the process. The order which triangles from your mesh are submitted to the pipeline can effect the final image. Pixels are square, so they only approximate the triangles (Figure 2), just as the triangles approximate the 3D image. The process of converting your triangles to pixels is called scan conversion, but before we can do this we need to perform some mathematics to check whether the triangle is visible and convert it from 3D to a 2D representation.


24.4 Graphics Pipeline Overview


Triangles are described by 3 vertices, each of which define a point in three dimensional space (x, y, z). To represent these in two dimensions we have to project the vertex co-ordinates onto a plane. We maintain the illusion of depth by using tricks like perspective (i.e. things the same size appear smaller the further away they are). We get to influence the graphics pipeline at two points, the vertex shader and the fragment shader, shown in orange in Figure 3.

If you are interested in a much more detailed explanation then we suggest that you read Andrew Stacey's tutorial on Using Matrices in Codea.

Step 1 - Vertex Shader (Clip Space Transformation)

The first phase of rasterization is to transform the vertices of each triangle into "clip space". Everything within the clip space region will be rendered to the output image, and everything that falls outside of this will be discarded. In clip space, the positive x direction is to the right, the positive y direction is up, and the positive z direction is away from the viewer. Clip space can be different for different vertices within a triangle. It is defined as a region of 3D space with the range [-w, w] in each of the x, y, and z directions. 

This is difficult to visualise and use so the vertices are normalised by dividing each co-ordinate (x, y, z) by w. After being normalised, the (x, y, z) co-ordinates will be in the range of -1 to +1. Dividing by w also applies a perspective effect to each of our triangles.

The entire process can be thought of as a mapping from the projection volume to a 2 unit cube with the origin at (0, 0, 0).


Figure 4. Clip Space Transformation & Normalisation.

In terms of the graphical pipeline (figure 3), this transformation is coded in the Vertex Shader. Open up the Shader Lab in Codea and tap on the vertex shader tab. In the main() function, the line:

gl_Position = modelViewProject * position;

performs the clip space transformation for you. 

The inputs to the vertex shader consist of:
  • Attributes - per vertex data supplied via vertex arrays (e.g. position, color and texCoord). They are signified by the attribute tag in GLSL;
  • Uniforms - constant data used by the vertex shader (e.g. modelViewProjection). Labelled as uniform in GLSL; and
  • Samplers - a specific type of uniforms that represent textures used by the vertex shader. These are optional.
The outputs of the vertex shader are called (somewhat redundantly) varying variables.

Step 2 - Primitive Assembly

A primitive is a geometric object which can be drawn by OpenGL ES (e.g. a point, line or triangle). In this stage, the shaded vertices are assembled into individual primitives.

Normalisation and Clipping will happen automatically in the Primitive Assembly stage between the vertex shader and fragment shader. Primitive Assembly will also convert from normalized device coordinates to window coordinates. As the name suggests, window coordinates are relative to the window that OpenGL is running within. Window coordinates have the bottom-left position as the x, y (0, 0) origin. The bounds for z are [0, 1], with 0 being the closest and 1 being the farthest away. Vertex positions outside of this range are not visible. The region of 3D space that is visible on the screen is referred to as the view frustum.

Step 3 - Rasterization

Rasterization converts the graphic primitives from the previous stage to two dimensional fragments. These 2D fragments represent pixels that can be drawn to the screen (Figure 2).

In this stage, the varying values are calculated for each fragment and passed as inputs to the fragment shader. In addition, the colour, depth, stencil and screen co-ordinates are generated and will be passed to the per-fragment operations (e.g. stencil, blend and dither).

Step 4 - Fragment Shader

The fragment shader is executed for each fragment produced by the rasterization stage and takes the following inputs:
  • Varying variables - outputs from the vertex shader that are generated for each fragment in the rasteriser using interpolation (e.g. vColor in the Ripple Shader Lab example).;
  • Uniforms - constant data used by the fragment shader (e.g. time and freq in the Ripple Shader Lab example).; and
  • Samplers - a specific type of uniforms that represent textures used by the fragment shader (e.g. texture in the Ripple Shader Lab example).
The output of the fragment shader will either be a colour value called gl_FragColor or it may be discarded (see Step 5).

Step 5 - Per Fragment Operations

The final step before writing to the frame buffer is to perform (where enabled) the following per fragment operations.
  1. Pixel ownership test - checks if the pixel is currently owned by the OpenGL context. If it isn't (e.g. the pixel is obscured by another view) then it isn't displayed.
  2. Scissor Test - if enabled, is used to restrict drawing to a certain part of the screen. If the fragment is outside the scissor region it is discarded.
  3. Stencil & Depth test - if enabled, OpenGL's stencil buffer can be used to mask an area.The stencil test conditionally discards a fragment based on the value in the stencil buffer. Similarly, if enabled the depth buffer test discards the incoming fragment if a depth comparison fails.
  4. Blending - combines the newly generated fragment colour value with the corresponding colour values in the frame buffer at that screen location.
  5. Dithering - simulates greater color depth to minimise artifacts that can occur from using limited precision. It is hardware-dependent and all OpenGL allows you to do is to turn it on or off.

24.5 A Simple Shader Example


Version 1.5 of Codea comes with a sample ripple shader (see Figure 1). The following fragment shader code will tint a texture with the tint colour by the tint amount.

// A basic fragment shader with tint.


// This represents the current texture on the mesh
// uniform lowp sampler2D texture;

// The interpolated vertex color for this fragment
// varying lowp vec4 vColor;

// The interpolated texture coordinate for this fragment
// varying highp vec2 vTexCoord;

void main()
{
    // Sample the texture at the interpolated coordinate
    
    lowp vec4 texColor = texture2D( texture, vTexCoord );
    
    // Tint colour - red is currently hard coded.
    // Tint amount - select a number between 0.0 and 1.0
    // Alternatively you could pass the tint color and amount
    // into your shader by defining above:
    //
    // uniform lowp vec4 tintColor;
    // uniform lowp float tintAmount;
    
    lowp vec4 tintColor = vec4(1.0,0.0,0.0,1.0);
    lowp float tintAmount = 0.3;
    tintColor.a = texColor.a;

    // Set the output color to the texture color
    // modified by the tint amount and colour.
    
    gl_FragColor = tintColor * tintAmount + texColor * (1.0 - tintAmount);
}

24.6 Appendix - GLSL Precision Qualifiers


You will notice the lowp, mediump and highp precision specifiers in the shader lab example. It is much faster to use lowp in calculations than highp.The required minimum ranges and precisions for the various precision qualifiers are:


Apple provides the following guidelines for using precision in iOS applications:
  • When in doubt, default to high precision.
  • Colours in the 0.0 to 1.0 range can usually be represented using low precision variables.
  • Position data should usually be stored as high precision.
  • Normals and vectors used in lighting calculations can usually be stored as medium precision.
  • After reducing precision, retest your application to ensure that the results are what you expect.